How to install BackTrack 5 to a HDD
First you need to download the BackTrack:
http://www.backtrack-linux.org/downloads/
You need to burn it to a bootable DVD
Press "DOWNLOAD" to skip the register and select the version of BackTrack
Selection Backtrack 5, Gnome or KDE (if you are not sure between the two, I find Gnome to be better), Pick between 32 or 64 bit (we’ll be using 32bit), ISO, and Direct.
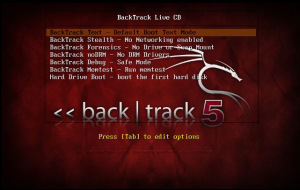
Boot your laptop or desktop with the DVD or Flash drive inserted and press your boot options key (normally F12) and select CD Rom or Removable Flash drive.
Select BackTrack Text – Default Boot Text Mode
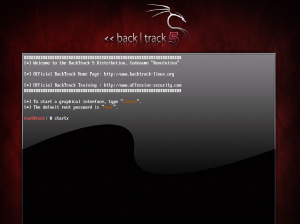
Backtrack will do some stuff then you should see the BackTrack console screen. Type startx to load the GUI screen.
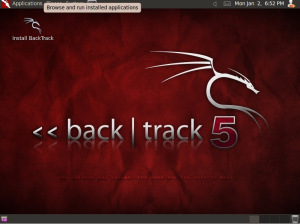
Now double-click the Install BackTrack icon on the top-left of the screen. This will run the Backtrack installer.
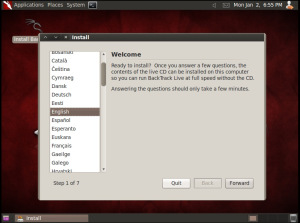
Run through the installer. It’s not too complicated, except when it comes to selecting a drive (Will cover dual booting later). For this example, we will just use the entire hard drive.
WARNING:This will delete ANY data on that drive
Also, the installer will stop a 99%. This is normal! It will stay at 99% for several minutes.
Once the computer restarts, remove the CD/Flashdrive and you will see the login screen for BackTrack. Login as “root” and the password as “toor“. Use the startx command to get into the GUI. There you have it! Backtrack 5 is install on your computer.
You need to burn it to a bootable DVD
Press "DOWNLOAD" to skip the register and select the version of BackTrack
Selection Backtrack 5, Gnome or KDE (if you are not sure between the two, I find Gnome to be better), Pick between 32 or 64 bit (we’ll be using 32bit), ISO, and Direct.
Boot your laptop or desktop with the DVD or Flash drive inserted and press your boot options key (normally F12) and select CD Rom or Removable Flash drive.
Select BackTrack Text – Default Boot Text Mode
Backtrack will do some stuff then you should see the BackTrack console screen. Type startx to load the GUI screen.
Now double-click the Install BackTrack icon on the top-left of the screen. This will run the Backtrack installer.
Run through the installer. It’s not too complicated, except when it comes to selecting a drive (Will cover dual booting later). For this example, we will just use the entire hard drive.
WARNING:This will delete ANY data on that drive
Also, the installer will stop a 99%. This is normal! It will stay at 99% for several minutes.
Once the computer restarts, remove the CD/Flashdrive and you will see the login screen for BackTrack. Login as “root” and the password as “toor“. Use the startx command to get into the GUI. There you have it! Backtrack 5 is install on your computer.
No comments:
Post a Comment